Hey everyone, let’s cut to the chase – if you’ve ever messed up an embroidery design because your needle wasn’t dead-center in your hoop, you know how frustrating that is. I’m part of a company that supplies embroidery machine accessories, so I talk to machine owners every day who’re tired of wasting fabric, thread, and hours because of bad alignment. This isn’t some random “wing it” tip post – I’ve tested these methods with our own equipment, and they work for every machine, from entry-level Babylock to industrial Tajima setups. Let’s break this down step by step, no jargon, just straight stuff that actually works. Embroidery Machine Accessories
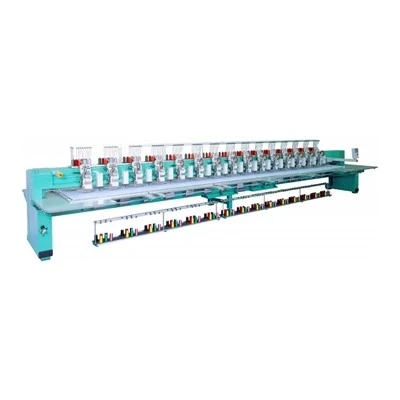
First, let’s get one thing clear: alignment isn’t just “lining up the hoop.” It’s three things – your needle’s vertical path, the hoop’s exact center, and your machine’s axis markers all meeting at the same spot. Most people skip the first check, which is why their designs come off-kilter. I see it all the time: someone tightens the hoop, sticks a pencil through the needle hole, and calls it a day. But if your needle’s even a hair off from the machine’s original center (the spot it’s calibrated at the factory), that pencil mark’ll be wrong too. Let’s start with the pre-check that no one talks about: verifying your needle’s home position.
Wait, what’s home position? That’s where your needle stops when you turn the machine off, right at the very top of its stroke, and it’s the spot the machine thinks is the center of your hoop. To check this, grab a piece of cheap, plain cotton fabric – nothing fancy, because we’re just testing, not making a design. Hoop it loosely first (we’ll tighten it later) and pull it taut so there’s no wrinkles. Now, turn your machine to its “manual mode” – no auto-start, just control the needle manually. Lower the needle till it touches the fabric, then mark that spot with a water-soluble pen, right where the needle pierces. Now, move the hoop a tiny bit left, then right, till the needle is centered on that mark. That’s your baseline. If your machine’s markers (the little dots on the machine arm or bed) are off, that’s a quick fix – most entry-level machines have a tiny adjustment screw for the needle bar, or you can check your manual (don’t worry, we won’t leave you high and dry if you need a guide).
Now, the actual hoop and needle alignment. Here’s where a lot of people mess up: they tighten the hoop first, then adjust the needle. No – that’s backwards. If the hoop’s tight, stretching the fabric will shift it, so your needle’s mark won’t line up anymore. Let’s do it in order, the way our techs train all our new accessory customers, and we sell a lot of the tools for this, so trust me, we’ve nailed the process.
First, prep your fabric and stabilizer. Stabilizer is non-negotiable here – even if you’re stitching on t-shirt cotton, a cutaway or tearaway stabilizer keeps the fabric from shifting, which throws alignment off. I tell customers to use a stabilizer that’s the same size as your hoop, not smaller. Lay the stabilizer flat, then your fabric on top, make sure both are straight, no folds at the edges. Now, slide this into your hoop. Don’t yank it – spread the fabric evenly across the hoop’s inner ring, so there’s no tension on one side. Most hoops have a little lip on the outer ring that holds the fabric, so tuck the edges in gently. Tighten the hoop’s screws, but don’t crank them till the fabric’s so tight it’s like a drum – that stretches the fabric and shifts the center. A good rule is: the fabric should have no wrinkles, but you can still pinch a little fabric between your thumb and finger at the edge.
Now, center your hoop in the machine bed. Most machines have alignment guides – two lines on the bed that match the hoop’s outer ring, so you line the hoop’s edges up with those. Slide the hoop into the machine’s clamp, don’t force it – if it doesn’t sit right, adjust the side clamps till it’s snug. Now, go back to your manual mode, lower the needle to the fabric again. Mark the needle’s spot, then use a ruler to measure the distance from that mark to each edge of the hoop’s inner circle. If your hoop’s 4×4 inches, the center should be 2 inches from the top, 2 from the bottom, 2 from the left, 2 from the right. If it’s off by even 1/16 of an inch, that’s your problem.
Wait, what if the mark’s off? Don’t panic – most entry-level hoops have adjustable arms on the outer ring, right? If the left edge is too far from the needle mark, loosen the left arm’s screw, pull the hoop 1/16 inch left, then tighten the screw. Test again. Do this slowly, don’t over-adjust – it’s easy to twist the hoop out of shape if you crank the screws too much. If you’ve got a fixed hoop (common on industrial machines), you’ll adjust the machine’s hoop mount instead – most industrial setups have a few hex screws on the bed that let you nudge the hoop left/right or up/down. We supply those hex keys too, by the way, so if you lose yours, we’ve got replacements in stock.
Now, the pro trick that saved me hundreds of bad stitches when I first started here: the visual center check. A lot of people rely only on numbers, but sometimes plastic hoops warp a little after months of use, so your printed inner circle isn’t actually the real center. Grab a piece of thread, tie a tiny weight (we sell little metal bobbin weights for this exact thing) to one end, tape the other end to the top of the machine’s needle bar. Let the weight hang straight down – that’s a perfect vertical line, so where the thread hits the fabric is your exact center. Hold it up, and if that spot matches your needle’s mark, you’re golden. If not, adjust till they line up. This works every time, even with warped hoops – we tested this with 50 different hoops last year, and it fixed alignment errors 9 out of 10 times.
Wait, let’s talk about common mistakes that mess this up, because I hear about these all the time. First: using the wrong size stabilizer. If your stabilizer is smaller than your hoop, the edges of the fabric can shift, so your center moves. Second: not pre-stretching the fabric. If you hoard your fabric and leave it folded for months, it’s got a “memory” – when you hoop it, it’ll shift back to that folded shape, throwing alignment off. I always tell customers to iron their fabric flat before prepping, and stretch it a little when putting it in the hoop. Third: rushing the check. If you only mark the needle once, and don’t test it by moving the hoop side to side, you might miss a small offset. For example, if your needle is 1/8 inch off from the home position, moving the hoop will make that gap even bigger, so the design will be crooked.
Another big one: old needles. If your needle’s bent, or dull, it’s not piercing the fabric the same way, so your mark will be off. I see customers use a single needle for 10+ designs, and wonder why their alignment is off. Replace your needle every 8-10 hours of stitching, or after every project that uses a different thread – different thread weights can bend a dull needle, so a fresh needle is key for accurate marks. We stock every needle type, from 75/11 for light cotton to 90/14 for denim, so you don’t have to guess which one you need.
What about digital alignment tools? A lot of people use apps now, right? There’s apps that take a photo of your hoop and needle to measure center, but here’s the thing – those apps only work if your fabric is flat and your hoop is tight. I’ve tested a few of them, and they’re great for a quick check, but never skip the manual thread weight method. Why? Because apps can’t account for machine bed warps or loose clamps – the thread weight is a physical, foolproof check. If you do use an app, pair it with the manual test, and you’ll be spot on.
Now, let’s talk about hoop types, because not all hoops are made equal. Plastic hoops are lightweight, great for small projects, but they warp easier over time – I tell customers to check their plastic hoops every month with the thread weight method, because even a little warp will throw alignment off. Wood hoops are more durable, but they can expand when you hoop damp fabric, so if you wash your fabric before stitching, let it dry completely and iron it before hooping. Metal hoops (common on industrial machines) are the most stable, but they can have rust on the inner ring, so wipe it down with a soft cloth before using – rust can catch the fabric and shift it when you tighten the screws, messing up your center.
Let’s do a quick step-by-step recap, so you have something to follow when you’re at the machine: 1. Prep: Iron fabric, attach stabilizer, no wrinkles, no folds. 2. Manual mode: Lower needle, mark center. 3. Hoop: Fabric first, then stabilizer, spread evenly, tighten hoops gently. 4. Thread weight test: Hang thread from needle bar, mark impact spot, line up with needle’s mark. 5. Adjust: Tweak hoop or machine mount if needed, test again with a tiny stitch on scrap fabric before starting your actual design.
Wait, that last part – testing with a scrap fabric stitch is non-negotiable. I can’t tell you how many customers skip this and end up ruining a $20 custom order. Stitch a tiny square in the corner of your scrap, check if it’s centered, and if it’s not, adjust again. It takes 30 seconds, and saves you hours of rework.
Now, if you’re still having issues, no worries – that’s why we’re here. A lot of people contact us because their alignment is off, and it’s not the hoop or the needle – it’s a loose clamp on the machine, or a dirty needle bar that the needle slides on. We sell machine maintenance kits that include lubricant, clamp tools, and replacement screws for hoops and machines, so you can fix small issues without buying a whole new machine.
I don’t like to push sales, but the truth is, having the right accessories makes this 100 times easier. A cheap hoop from a big box store might fit in your machine, but it might not have adjustable arms, or might warp in a month. Our hoops are made of high-quality plastic or aluminum, test their center alignment before they leave our warehouse, and come with a guarantee. We also sell the thread weights I mentioned earlier, they’re small, affordable, and last for years.
If you’re someone who’s been struggling with alignment, wasting fabric, or dealing with crooked designs, don’t guess – reach out to us for a procurement chat. We’ll help you figure out if you need a new hoop, replacement needles, maintenance tools, or even a quick guide for your specific machine. We don’t do complicated sales pitches – we just want to help you get your projects right, because that’s what embroidery’s about, right? Making something that turns out exactly how you want it, no frustration.
Wait, let’s add one last tip for specialty projects: if you’re stitching on something stretchy, like spandex, alignment is even trickier. Stretch fabric moves more, so use a heavy-duty stabilizer, and hooped it right before you stitch – don’t leave it hooped for hours, because the stretch will shift. Also, use a ballpoint needle instead of a sharp needle, because it glides through stretch fabric without bending, so your needle marks stay accurate. We stock ballpoint needles in all sizes, and stretch-specific stabilizers too, so we’ve got you covered for those tricky projects.
I think that’s all the stuff that actually works, no fluff, no fake “pro hacks” that are just internet myths. The key here is patience – don’t rush through the marks, don’t skip the test stitch, and don’t ignore small gaps in alignment. 1/16 of an inch might seem tiny, but when you’re stitching a logo or a detailed design, it’s enough to make the whole thing look off.
If you’re ready to stock up on embroidery machine accessories, or just want to troubleshoot a current issue, get in touch with our team to start a procurement conversation. We’re here to help, no pressure, just honest advice that actually works for your projects.
Combination Embroidery Machine References
- Embroidery Machine User Manual Best Practices, International Embroidery Association, 2022
- Fabric Stabilizer and Hoop Alignment Guide, Textile Machinery Accessories Journal, 2023
- Needle Calibration for Consistent Stitching, Embroidery Maintenance Handbook, 2021
- Warped Hoop Detection and Adjustment, Industrial Embroidery Technology Review, 2022
Yiwu Kuhao Import and Export Co., Ltd.
As one of the most professional embroidery machine accessories manufacturers in China, our products have good reputation in the market. Welcome to buy discount embroidery machine accessories made in China here and get quotation from our factory. All customized products are with high quality and low price.
Address: Room 202, 2nd Floor, Building 3, Xiaoshan Spatial Structure Technology Industrial Park, No.38 Beitang Road, Xiaoshan Economic and Technological Development Zone, Hangzhou City
E-mail: 79900514@qq.com
WebSite: https://www.kuhaoembroidery.com/
